
Resources
Help & articles
Guides, how-tos and news for your catering business.
Help topics
Menu & Items
Items & Categories
Set up menu items and master categories so they are easy to find when quoting and group sensibly on the customer's quote.
Learn how to set up and manage your menu items and categories in Puree.
Understanding Master Categories
Items are organised into five master categories: Menu Items for food, Equipment for plates, cutlery, and serving equipment, Beverages for drinks and beverage packages, Miscellaneous for other items, and Venue Items (available if the venue module is enabled).
Each master category contains custom categories and items. For example, within Menu Items, you might create categories like Baking, Sandwiches, Savoury, Entrees, Mains, and Desserts.
Managing Categories
Categories organise items and control how they appear in quotes, online forms, and menus. Note that when using Menu Headers (which only apply to the Menu Items master category), items are grouped by the menu header rather than by category. For more details, see our article Categories vs Menu Headers: Understanding the Difference. To manage categories, navigate to the relevant master category (such as Menu Items), then click Manage categories to open the Menu Organization page. Click Add category to create one, and use Edit or drag-and-drop to rename and reorder them.
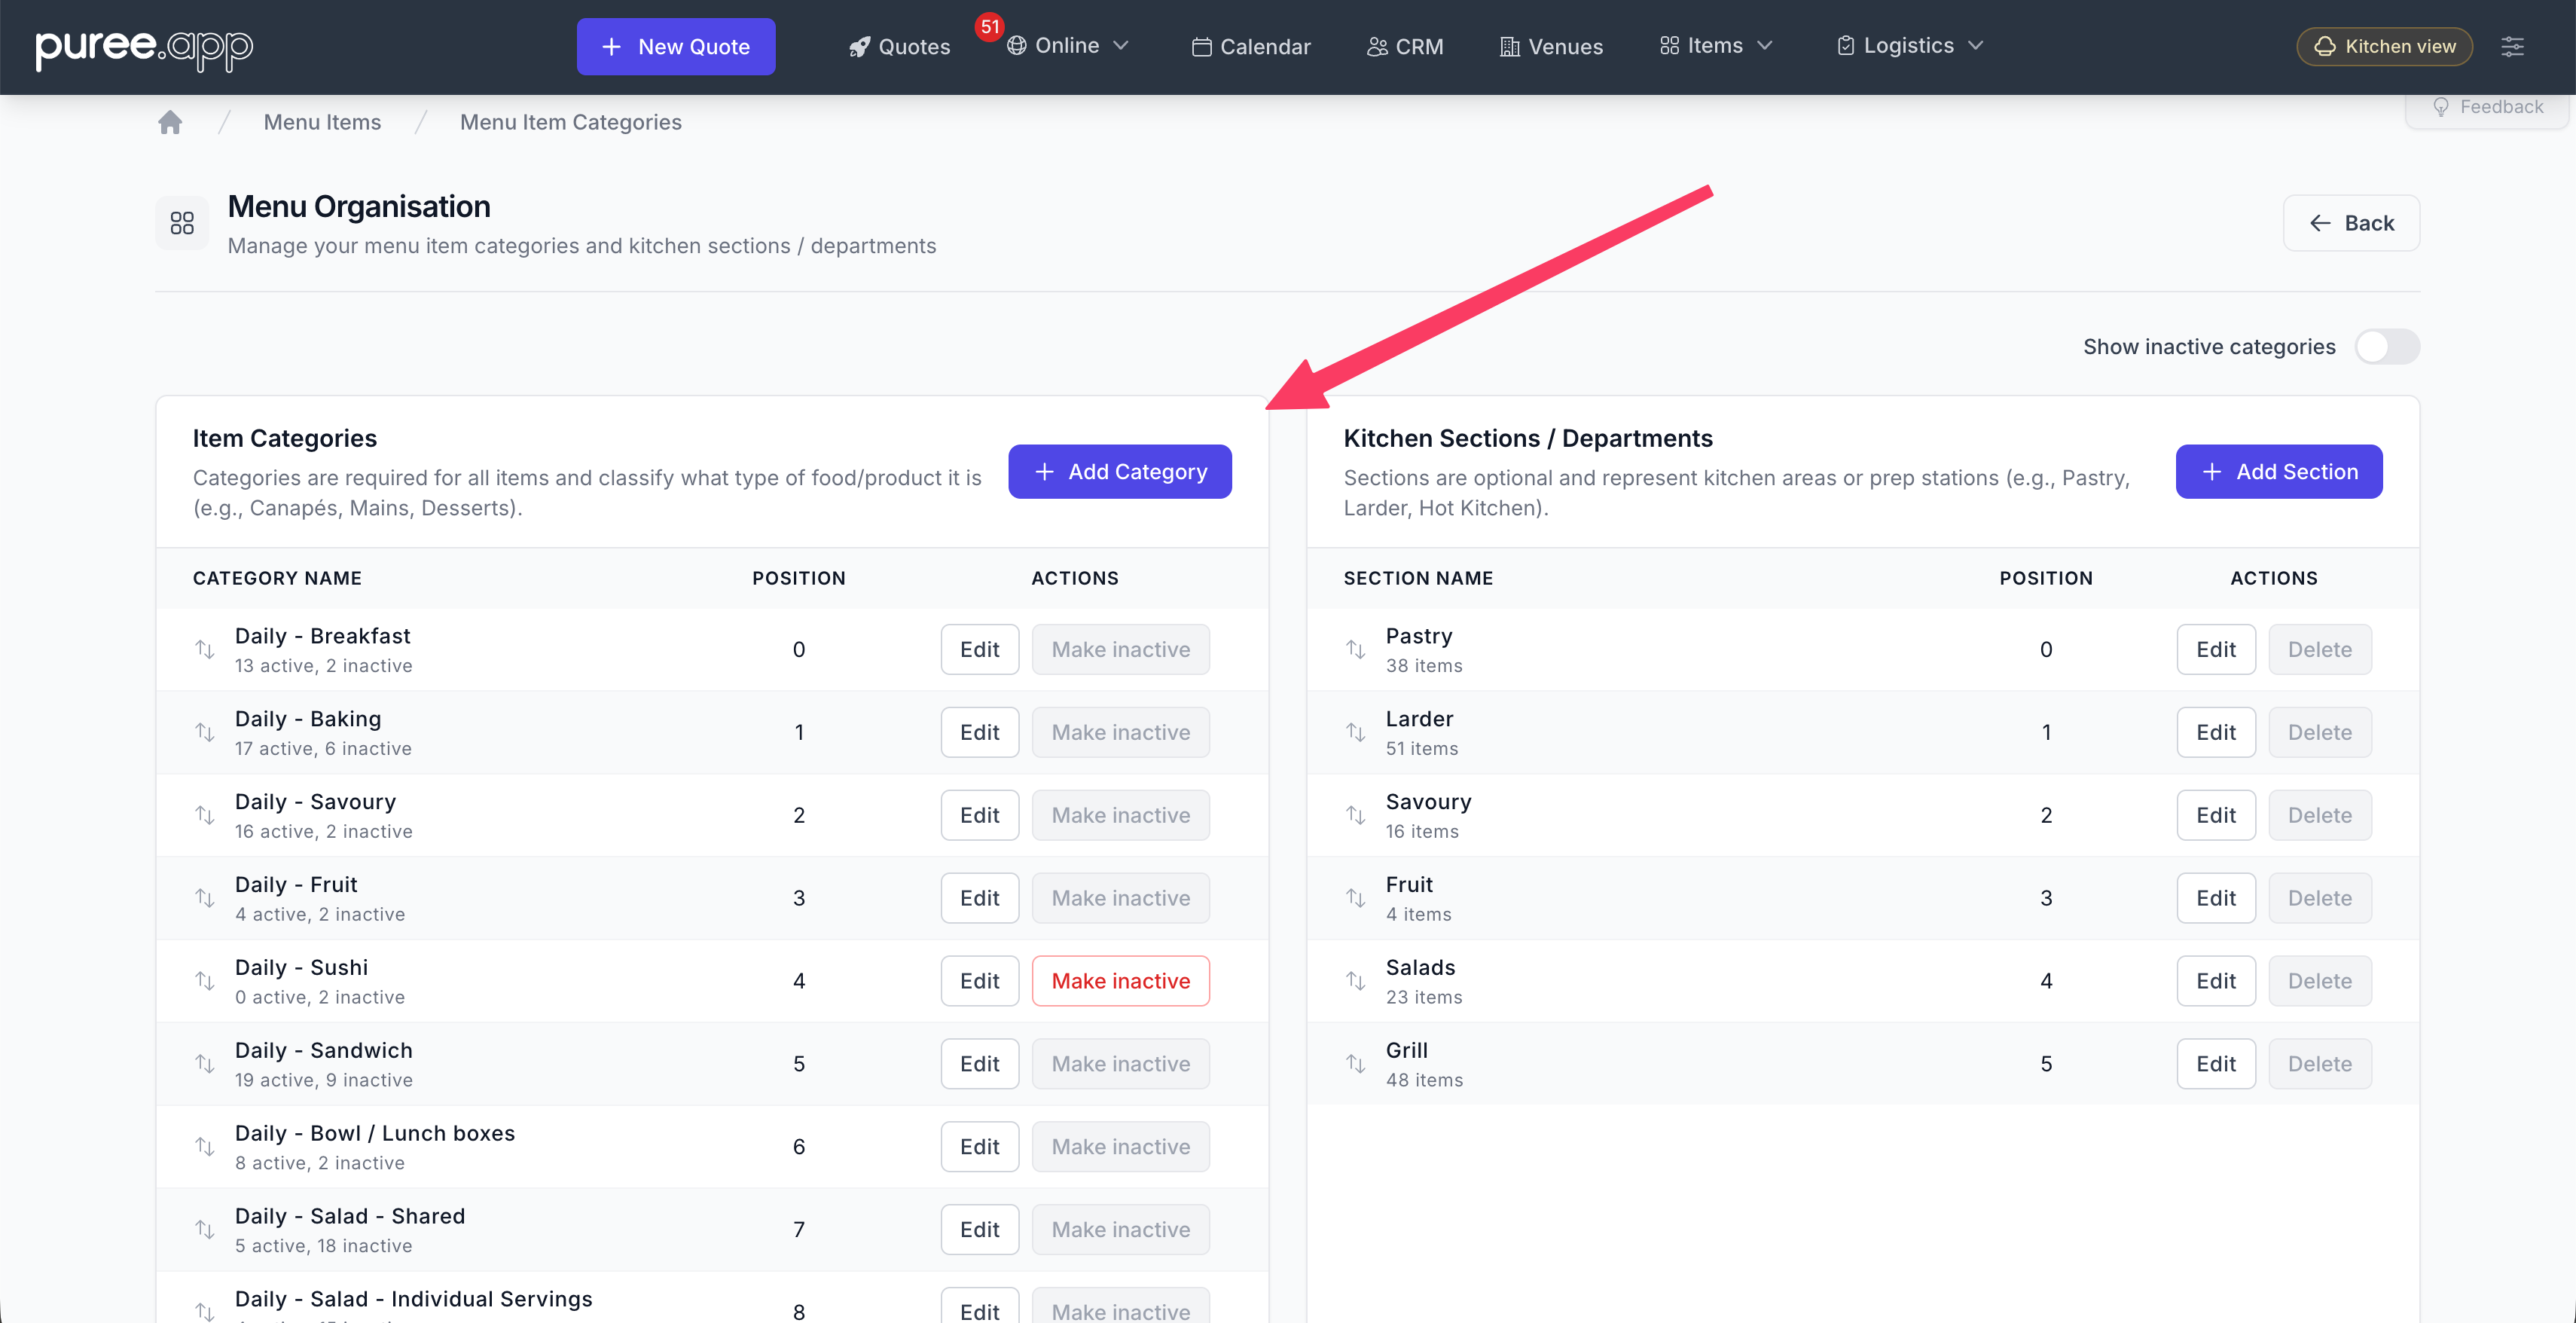
The order of your categories determines how they appear in quotes. For example, you might place breakfast items at the top, entrees, mains, and sides in the middle, and desserts at the bottom.
For guidance on how to name and structure your categories, see our article How to Name Your Menu Categories.
Category Display Names
Each category has a Name and an optional Display Name. The name appears internally and on quotes. The display name appears on online order forms and menus.
For example, a category named “Buffet Mains” internally can have a display name of “Mains” for online pages.
Default Commentary
Each category has a default commentary field — a block of text that appears under the category’s heading, above its items, on your quotes. It seeds every new quote that uses the category and can be tailored per quote. This is customer-facing and shows on quotes only — it never appears on dockets, reports or menus. For full details, see our Menu & Category Commentary help page.
Working with Items
Items are the individual products or services within each category. On the items list, click + New Menu Item to create one, or Edit on any row to change an existing item. A slide-over panel displays the item details.
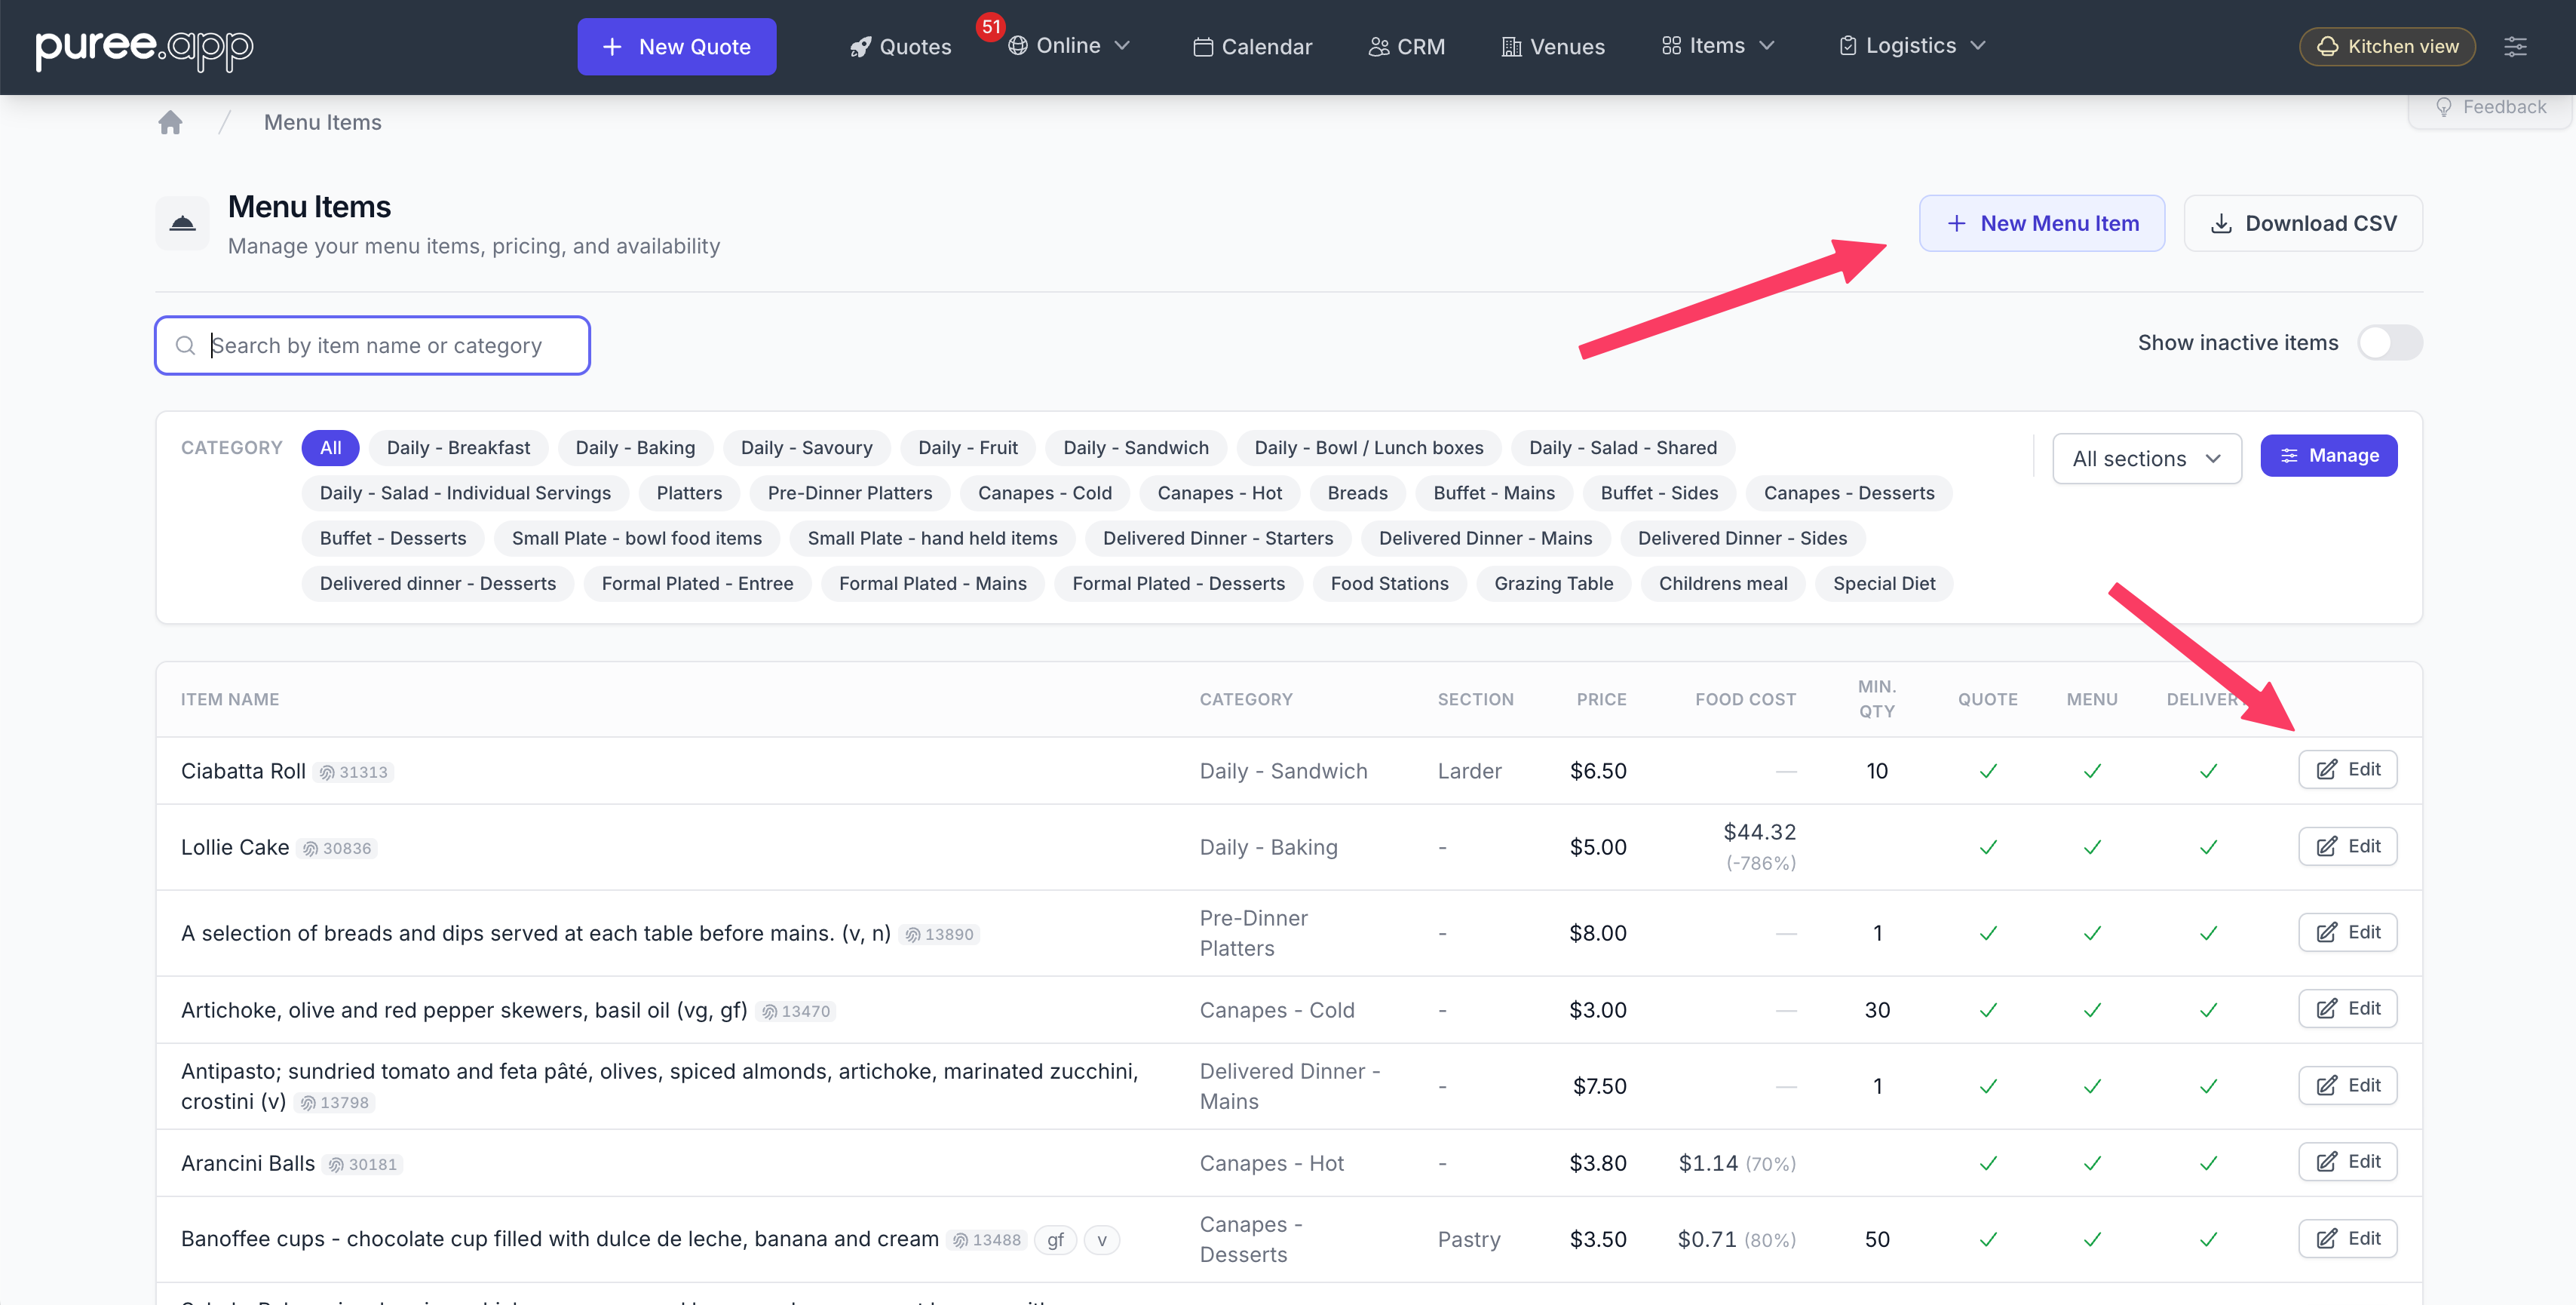
Items can be reordered by dragging and dropping once you’ve selected a category in the Category filter. The order determines how items appear in quotes.
When you have many items across multiple categories, use the Search items field to find them quickly. The search runs within your current filters, so clear the Category filter to search across all categories.
Item Tags
Give items your own internal tags, such as “Menu1” or “Winter 2026”, to find a group of items whatever categories they sit in. Add them in the Tags field of the item’s Classification block (venue items have none); type a new tag’s name and press Enter to create it. On a saved item each change saves straight away; on a new item the tags are saved with the item. The items list has a Tags column and a Tag filter, and its search matches tag names. Item tags are never shown to customers. Manage them on the Item tags tab under Settings → Tags, and see Item Tags: Find a Whole Menu in One Search, Whatever Categories It Sits In for everywhere they help.


Deleting Items
To take an item off your menu, click Make inactive at the bottom left of its edit panel. It disappears from the quote builder, your online order form and your menus, and comes back with everything intact when you click Make active. Delete is for items you will never sell again. Both, plus deleting and deactivating categories, are covered on our Deleting Items help page.
Configuring Item Details
When creating or editing an item, you have access to configuration options that control how the item behaves throughout Puree and where it appears in quotes, online menus, and operational documents.
Basic Information
Each item requires a name and must be assigned to a category. Menu items can optionally be assigned to sections and departments. Learn more in our Sections & Departments help page.
Item Options
Items can have selectable options — such as portion sizes or dietary variants — with optional surcharges added to the base price. Options appear when adding an item to a quote, flow through to dockets, and are available in your online store. See our Item Options help page for full details.
Delivery Temperature and Suitability
Items can be marked with delivery temperatures: heated, chilled, or either. This information appears on chef dockets. For more details, see our Hot & Cold Delivery help page.
Items can be marked as unsuitable for delivery. These items will not appear in delivery orders but can be used for staffed events or customer collection orders.
Pricing and Minimum Quantities
Each item has a price field. The minimum quantity setting controls how many units must be ordered. On online order forms, this minimum is enforced and customers cannot order less than the specified amount. Catalogue minimum quantities are enforced for standalone online orders; the staff quote builder does not enforce or warn on item minimum quantities.
Costs
Every item can record what it costs you, beside what you charge, so Puree can show its margin. Menu items take their cost from a recipe or a figure you type, beverages from their purchase cost, and equipment either from what you pay to hire it or, for things you own, a cost per use worked out from what it would cost to replace. Costs are internal and never appear on a quote, a docket or your online store. See our Item Costs help page.
Display Options and Menu Names
Items can have a menu display name that differs from their internal name. Leave this blank to use the standard name.
They can also carry a second name for the paperwork. Name on chef docket on a menu item, Name on docket on an equipment, beverage or miscellaneous one, and it replaces the catalogue name on the documents that group reaches: the chef docket, the count sheets, the consolidated docket and the driver docket. Leave it blank and the item’s own name is used. It never appears on a quote, a customer menu or an online order form, so you can name something after the shelf it lives on without a customer reading it. Packaging stickers are the one exception and keep the catalogue name, since a sticker goes on a box a customer may see.
A quote can override it for one job: click the line in the quote builder and open Docket name under the item name. The catalogue stays as it is. The same modal carries a Chef Note (menu) or Docket Note (everything else) for that line, which prints on the docket beside the name. Our article Notes and Bespoke Names for Equipment: Tell the Warehouse Exactly What to Pack works through both from the warehouse’s side.
You can control where items appear: in quotes, on online menus, and in operational documents (chef dockets, driver dockets, event briefs).
Dietary Codes and Photos
Tick the relevant dietary codes for each item (vegetarian, vegan, gluten-free, etc.). These codes are displayed throughout the system. For more information, see our article Introducing Dietary Codes Feature in Puree.app.
You can add photos to items by clicking the upload area or dragging and dropping an image. Tick the box if you want the photo to appear in quotes. For more information, see our article Improved Quotes with the new Photos Feature.
Bundles
A bundle is a menu item made of other catalogue items, such as a platter, a boxed lunch or a hamper. The customer sees one priced line with the contents listed underneath, and the kitchen sees the dishes. Tick This item is a bundle directly under the item name to set one up. Everything about bundles is on our Bundles help page.
Sections and Departments
Sections and departments are the same thing and only apply to menu items. They split your menu by the part of the kitchen that makes it (pastry, hot kitchen, cold prep), and kitchen and logistics reports can be filtered by them. See our Sections & Departments help page and our article New Sections/Departments Feature and Kitchen Reports in Puree.app.
Bulk Operations and Efficiency Tools
To make changes to multiple items at once, click Bulk edit in the toolbar at the top of the items list. This allows you to update multiple items simultaneously rather than editing them individually.
Bulk edit has a Tags column that saves as you tick (or as you type a new tag’s name and press Enter), and Add tag and Remove tag in the field list, which add or remove one tag on every selected item without touching their other tags. They appear once your account has at least one item tag that hasn’t been deleted.
You can download a CSV file of your items for record-keeping or analysis.
Understanding the Differences Between Master Categories
Sections and departments only apply to menu items. Equipment, beverage, and miscellaneous items cannot be assigned to sections or departments.
Venue items are only available if the venue module is enabled. The process for managing items is similar across all master categories.
Set an item’s tax rate
When item-level tax is enabled, the item’s pricing area includes Tax → Tax rate. Leave it on the account default for ordinary items, or choose an additional band for an item taxed differently.
Create bands in Settings → Tax → Additional tax rates. Each band has a name and percentage; a 0% rate calculates no tax regardless of the name.
You can choose a different Tax band on an individual quote line without changing the item’s usual setting. A quote-wide Override all tax bands takes precedence while enabled.
Online forms and menus use the item’s band to explain exceptions to the default tax treatment. See Tax Rates.